

Comparing Mushroom Fruiting Chambers
How a Fruiting Chamber Works: Quick Answer
A fruiting chamber creates the humid, stable environment mushrooms need to grow from colonised substrate. It works by trapping moisture close to the growing mycelium while still allowing fresh air to exchange: too little airflow and growth stalls; too much and the surface dries out. Different chamber designs achieve that balance in different ways, whether through a passive humidity reservoir, a near-sealed lid, or an active humidifier on a controller, alongside filtered holes or vents for gas exchange and indirect light to trigger pinning. Temperature matters too, since most species fruit best within a fairly narrow range. Get humidity, airflow, and light working together, and the chamber essentially mimics the natural conditions mushrooms would encounter outdoors.
How a Fruiting Chamber Works: Environmental Principles for Home Growers
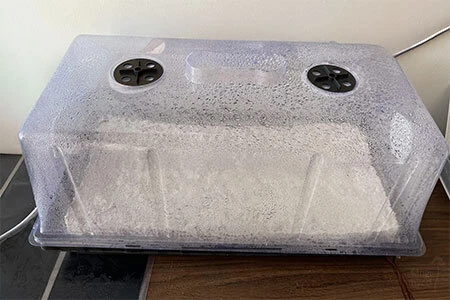
Every mushroom fruiting chamber performs the same four jobs, whether it cost £8 or £300 to build. It must hold humidity between 85–95% RH, cycle fresh air to remove CO₂, maintain temperature within the target range for the species being grown (15–24°C covers most popular UK gourmet varieties, though blue oyster prefers cooler and pink oyster warmer), and deliver an appropriate light cycle to trigger and sustain pinning. Get any one of those wrong and the results are visible within days as aborted pins, sparse colonisation, or the creeping green of trichoderma contamination [1].
Fresh air exchange is where most first grows often fail. Elevated CO₂ rarely kills mycelium outright, but it suppresses pinning, produces elongated stems and undersized caps, and creates the stagnant microenvironment that competing organisms prefer. Choosing a chamber that cannot adequately exchange air for the species and substrate volume you are running is one of the most consistent sources of disappointment for new growers.
Five popular fruiting setups among growers are the Shotgun Fruiting Chamber (SGFC), the Monotub, the Martha Tent, the grow tent, and the filtered polypropylene grow bag,. For growers ready to work across the full cycle using bags our Canopio 2 Part Grow Kit pairs three pre-poured agar plates with pre-sterilised grain, CVG bulk substrate, a fruiting bag and full step-by-step instructions — giving intermediate cultivators a structured pathway from spore or liquid culture through to first flush.
Each serves a different grower profile, and none is universally superior. The grow bag has arguably become the most popular option for gourmet species today, particular with beginners, working as a self-contained fruiting vessel rather than a chamber in the traditional sense. The table below captures the core differences at a glance.
|
Type |
Build Complexity |
Space Footprint |
FAE Type |
Humidity Retention |
Max Concurrent Blocks |
|---|---|---|---|---|---|
|
Shotgun Fruiting Chamber (SGFC) |
Low |
Small |
Passive |
Moderate |
1–2 |
|
Monotub |
Low |
Small–Medium |
Passive |
High |
1–4 (stackable) |
|
Martha Tent |
Medium |
Medium–Large |
Active |
Very High |
6–12+ |
|
Grow Tent |
High |
Large |
Active |
Very High |
12+ |
|
Fruiting Bag |
Very Low |
Very Small |
Passive (filter patch) |
High |
1 per bag (stackable) |
Understanding the environmental logic before picking a chamber is the difference between a satisfying flush and an expensive lesson.
Passive Fruiting Chambers: Shotgun and Monotub Options for Smaller UK Spaces
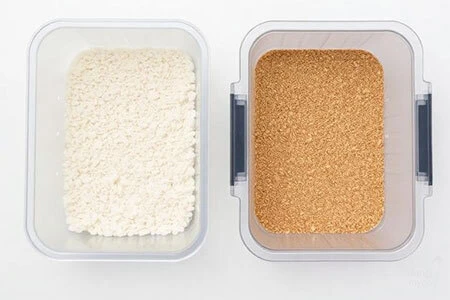
The SGFC and monotub are both passive designs suited to smaller growing spaces, and neither requires electricity to run. The experience of using them day-to-day is very different, though, and understanding those differences before you build one saves a lot of wasted effort.
The Shotgun Fruiting Chamber is a clear plastic storage tub drilled with holes across all six faces, filled with a layer of damp perlite. Hole spacing, size, and pattern vary between designs, but the core principle is the same: the perlite evaporates slowly, maintaining a humid microclimate around the substrate sitting above it.
Modern practice puts the fruiting block on a small elevated platform above the perlite (a jar lid or short piece of wire mesh works well) rather than resting it directly on the wet material, which reduces the bacterial contamination risk at the base of the block. The trade-off with the SGFC design is constant maintenance: because the holes allow uninterrupted passive airflow, that same airflow evaporates moisture from the chamber quickly, and humidity has to be actively replaced through misting several times a day [2]. In a heated British home during winter, an SGFC may need misting two to four times daily to stay in the 85–95% RH range. For a first-time grower testing the process with a single grain bag, this level of engagement is educational. As a long-term strategy, it is exhausting.
Monotubs take the opposite approach. A large, unmodified or lightly modified storage tub creates a near-sealed environment. Humidity accumulates naturally from substrate transpiration, and the restricted gas exchange slows evaporation dramatically. This makes the monotub significantly more forgiving in the dry indoor conditions common across the UK, especially during colder months. Monotubs also stack efficiently, which matters in a flat or terraced house where bench space is limited.
Passive FAE in a monotub is managed by covering small drilled holes with a filter medium that lets air move while keeping contaminants out. Micropore tape has become one of the mainstream choices: two layers over the bottom holes and one over the top is a common starting point, and adding or removing layers gives precise, reversible control over airflow. Buying tape wide enough to cover each hole in a single strip is worth the small extra cost, since overlapping strips can compress the filter and reduce airflow through the hole beneath. Round filter discs and polyfill stuffing are equally popular alternatives: filter discs offer a consistent, pre-made airflow rate straight from the packet, while polyfill lets you vary density by how tightly you pack it into each hole. A newer approach skips drilled holes entirely in favour of a gasket-lidded storage tub, venting instead by briefly cracking the lid once or twice daily. This suits growers in high-humidity environments who want to minimise the surface area available to airborne contaminants.
→ Increasing mushroom yield with a monotub
A method that sits alongside these two passive chambers, and has arguably become the most widely used fruiting approach for gourmet species in the UK, is the filtered polypropylene grow bag. Modern grow bags come with a pre-installed micron-rated filter patch built into the plastic, which handles gas exchange automatically. The bag itself provides the sealed environment, filtered airflow, and moisture retention that a chamber would otherwise supply, so bags can either fruit standalone if the surrounding room is humid enough, or sit inside a Martha Tent or grow tent to boost humidity around the fruiting body during the flush. All-in-one bags, which combine spawn and bulk substrate in a single sealed unit, have become the default choice for many home growers of oyster, lion's mane, and reishi, since they collapse the inoculation, colonisation, and fruiting stages into a single container with no substrate transfer required.
Verdict: The SGFC suits growers trying their very first mushroom fruiting chamber grow. It is cheap, instructive, and requires no equipment beyond a drill. Monotubs suit those ready for a bulk grow who want more yield without proportionally more labour. Techniques incorporating filtered fruiting bags suit growers of gourmet species who want to minimise chamber setup entirely, either fruiting the bag standalone or pairing it with a Martha Tent for humidity support during longer fruiting cycles.
Building and Maintaining an Active Fruiting Chamber: Martha Tents and Grow Tents
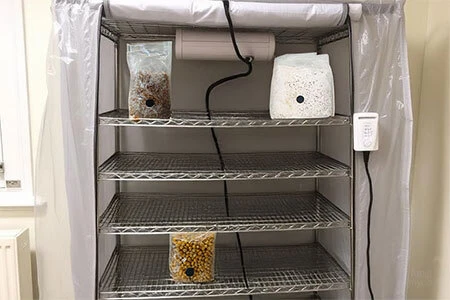
When passive chambers can no longer meet the demands of a growing operation, active systems become the practical next step. Martha Tents and grow tents both require more initial assembly than passive alternatives, but the payoff is a controllable, scalable fruiting environment suited to serious home growers and small-scale producers, especially where climates can vary massively like the UK.
A Martha Tent is built around a chrome wire shelving unit, typically 160 to 165 cm tall with four to five tiers, enclosed in a clear PVC cover. Assembly takes two to three hours for a first-time builder. The humidifier sits at the base or clips to a lower shelf, directing mist upward through the tiers, and an Inkbird or similar hygro-controller plugs between the humidifier and the mains, cutting power once the target RH is reached and restoring it when levels drop. This single addition transforms a manual process into an automated one and is particularly valuable for growers managing work schedules around growing cycles.
Grow tents provide a more robust structure with thicker walls, better light exclusion, and dedicated vent ports for inline fans. They require more planning: fan sizing, carbon filter placement if odour management is needed, and ducting all need to be considered before build. A 60 × 60 × 140 cm tent with a 4-inch inline fan on a timer provides adequate FAE for up to six medium fruiting blocks simultaneously.
Between cycles, both active systems need thorough cleaning. Wiping interior surfaces with a 3% hydrogen peroxide solution (or 70% isopropyl alcohol) removes residual spore deposits and mycelial fragments before the next batch is introduced. UK growers operating in older properties should pay particular attention to corner seams and shelf brackets, where moisture can accumulate and harbour competing organisms between flushes.
Contamination, Common Failures, and How Chamber Choice Affects Both
Contamination looks like a hygiene problem, but chamber design shapes the risk profile as much as sterile technique does. Each of the four chamber types has its own strengths and weaknesses when it comes to keeping competing organisms out, and understanding those trade-offs is where most growers make their biggest gains between flushes.
The SGFC, with its frequent misting and constant passive airflow, exposes the substrate to ambient air repeatedly throughout the day. Every misting event is an opportunity for airborne spores such as trichoderma, aspergillus, and bacterial blotch to land on exposed grain or bulk substrate. The risk is manageable with good technique, but the design amplifies exposure compared to more sealed alternatives. This is a particularly relevant consideration for UK growers, where older housing stock can harbour higher ambient mould spore counts in autumn.
The monotub's near-sealed environment cuts both ways. Contamination has far less opportunity to enter during fruiting, but if it was introduced at inoculation, before the tub was sealed, the enclosed space accelerates its spread. Catching problems early is harder because the substrate is less visible through the sides of the tub. The filter medium covering the holes (micropore tape, round filter discs, or polyfill) filters incoming air, keeping the risk of contaminants entering lower than with an unfiltered vent. However, no passive ventilation design is completely contamination-proof.
Poor FAE links directly to contamination. Elevated CO₂ creates the stagnant, moist conditions that competing organisms thrive in, which is why a chamber that cannot exchange air adequately tends to see both poor yield and higher contamination rates in the same flush. The two symptoms share a root cause.
Martha Tents and grow tents have more interior surfaces to sanitise between cycles. Wiping down with a 3% hydrogen peroxide solution between flushes is standard practice and takes only a few minutes, and the discipline pays off across multiple cycles.
Getting more flushes is fundamentally about maintaining chamber hygiene and managing substrate hydration correctly. After harvesting, remove all spent mushroom tissue cleanly, soak or mist the substrate to rehydrate it, and return it to fruiting conditions. Most gourmet species will produce two to three flushes from a well-maintained block, with oyster sometimes stretching to a fourth, provided the chamber stays clean and humidity is restored promptly.
FAQs
A mnotub is a largely sealed tub that retains humidity passively with minimal maintenance, suited to bulk grows. A Shotgun Fruiting Chamber uses a perlite bed and drilled holes for passive airflow, requiring frequent misting. The SGFC suits first-time growers; the monotub suits those ready for a larger, lower-maintenance fruiting cycle.
The Shotgun Fruiting Chamber is the most accessible starting point due to its low build cost and simple construction. However, UK growers dealing with dry central heating may find a monotub easier to maintain humidity in, as its near-sealed design reduces the evaporation that makes SGFCs labour-intensive during winter months.
Passive chambers like the SGFC rely on a damp perlite layer and regular misting, typically two to four times daily. Monotubs retain humidity through a near-sealed lid with filtered holes (micropore tape, round filter discs, and polyfill are all popular coverings). Martha Tents and grow tents use an ultrasonic humidifier on a controller set to 85–95% RH. In UK winters, active humidification becomes near-essential as central heating dries ambient air significantly.
In the UK, an SGFC typically costs £5–£15 in materials. A monotub runs £10–£25. A Martha Tent setup, including shelving, tent, humidifier, and controller, costs £80–£200 depending on components. A grow tent with inline fan and environmental controls sits between £150 and £350 when sourced from UK suppliers.
Oyster mushrooms are tolerant of varied conditions, making them compatible with most fruiting approaches. Filtered polypropylene fruiting bags have become the default choice for many UK oyster growers, since the pre-installed filter patch handles gas exchange automatically and the bag can either fruit standalone or sit inside a Martha Tent for humidity support. For growers who want more visual control across multiple blocks, the monotub suits single-block grows while the Martha Tent scales production across several bags at once. Whichever setup you choose, oysters need strong fresh air exchange to produce dense, healthy flushes rather than long-stemmed, small-capped ones.
- AHDB Horticulture — Trichoderma green mould diagnostic assays for improved disease management. Available at: https://horticulture.ahdb.org.uk/m-048-trichoderma-green-mould-diagnostic-assays-for-improved-disease-management (Accessed 14 August 2026).
- Shroomery, All in one bags vs Mono Tubs a pros and cons list. Available at: https://www.shroomery.org/forums/showflat.php/Number/27722895 (Accessed 14 August 2026).