

Spore Microscopy & Research
Spore Microscopy & Research: Quick Answer
Spore Microscopy & Research is the scientific practice of examining fungal spores under magnification to study their structure, identify species, and build a broader understanding of the fungal kingdom. It begins with knowing how spores form and extends through sample collection, species selection, and detailed morphological observation. Researchers and enthusiasts alike use this discipline to connect what they see under a lens to the living biology of fungi. Whether you are a complete beginner or someone refining an existing practice, this pillar covers the full journey — from the origins of a single spore to building a rigorous, long-term research habit.
Where It All Begins: The Origins and Formation of Fungal Spores
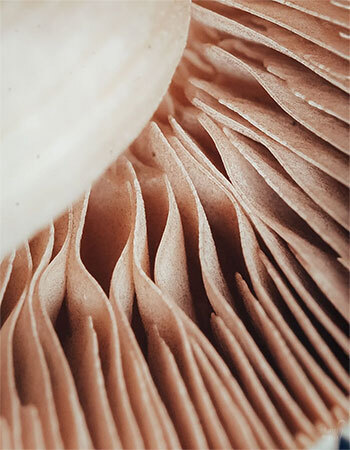
Every spore begins somewhere. Long before a slide is prepared or a microscope is switched on, a remarkable biological process is already underway inside the fruiting body of a fungus. Spores are the primary reproductive units of fungi, and their formation is both precise and fascinating. Different species produce spores through different mechanisms — some through sexual reproduction, others asexually — but the outcome is always a structure built for resilience and dispersal.
First-time researchers are often surprised at just how much variation exists even at this foundational stage. The environment in which a fungus grows, the conditions inside the fruiting body, and the species-specific biology all influence the spores that are eventually produced. This means two samples from the same species grown under different conditions can show subtle differences under magnification — something worth keeping in mind as you build observational experience.
Understanding spore formation grounds your microscopy practice in real biology. It transforms what might otherwise feel like an abstract technical exercise into something genuinely connected to the natural world. Before picking up a pipette or preparing a slide, knowing what you are looking at — and why it exists — sharpens every observation that follows.
Getting Your Setup Right: Environment, Equipment & Materials
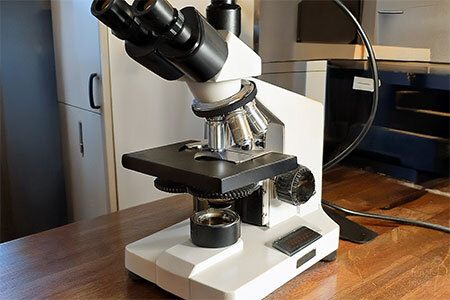
Nobody tells you this at the start, but your workspace matters almost as much as your microscope. A draughty room ruins spore prints before they've even formed. Dust ruins slides you haven't even prepared yet. I learned this the hard way, working on a wobbly kitchen table with the window ajar — half my early samples were contaminated before I understood why.
Getting this right isn't complicated, but it is easy to overlook: a stable, low-traffic surface, decent lighting, and a small kit of consistent tools — pipettes, slides, coverslips, storage vials — kept clean and dedicated to this hobby alone. Sourcing reliable materials matters too, since inconsistent quality quietly undermines everything downstream.
Collecting and Storing Spores: Formats, Tools, and What to Know First

Knowing what spores are is one thing. Knowing how to capture and preserve them properly is something else entirely. Collection is where theoretical knowledge meets practical decision-making, and the choices you make here directly affect the quality of your microscopy work downstream.
There are three main formats used in spore research: syringes, swabs, and prints. Each one serves a distinct purpose. Spore syringes suspend material in solution, making them well-suited to applications where you need a consistent, easy-to-apply sample. Swabs capture surface deposits and are particularly useful for rapid preparation. Prints — made by placing a cap face-down and allowing spores to fall onto a surface — preserve the deposit in its natural pattern and can be stored for extended periods.
One thing that catches beginners off guard is that the format choice also determines storage requirements. A syringe stored incorrectly will degrade in ways a print may not, and vice versa. Getting this right from the outset protects not just one sample but your entire research collection.
Selecting the Right Spores for Your Microscopy Goals
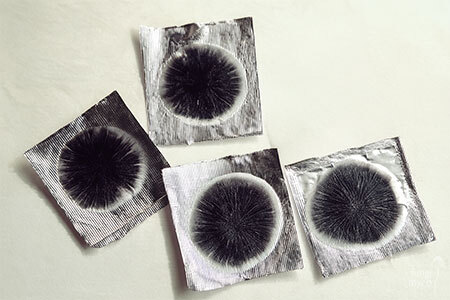
Most beginners assume any spore sample will do, that the real skill sits entirely in the microscopy technique. It doesn't. Species choice shapes what you can actually observe — ornamentation, colour, distinctive shape — and some are simply better teachers than others when you're starting out.
Magic mushroom spores are a genuinely popular starting point here, partly because they're legal to study in the UK — no psilocybin exists in spore form, so the law doesn't touch them until germination begins [1] — and partly because their morphology happens to be well documented, which makes cross-referencing your observations far easier. Beyond these, the same logic applies more broadly: some fungi carry unmistakable ornamentation or colour, others are subtler and better suited once you've built a stronger reference base.
Examining and Identifying Spores: Morphology, Taxonomy, and What You Are Looking At
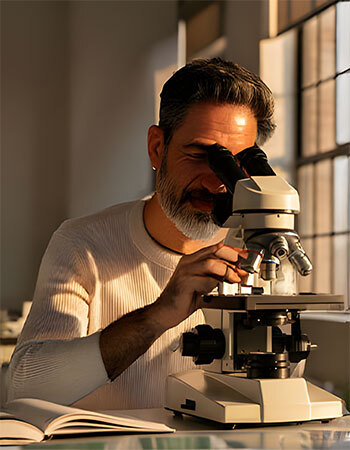
This is where microscopy becomes identification. With a prepared sample in place and your equipment ready, the focus shifts to reading what is actually in front of you — and that requires understanding spore morphology.
Morphology is simply the study of form. For spores, this means examining shape, dimensions, surface texture, and pigmentation [2]. Each of these characteristics carries taxonomic meaning. A spore that is ellipsoidal and smooth tells a very different story from one that is angular, thick-walled, or covered in fine warts. Learning to notice and record these distinctions is the core competency of spore identification, and it takes time to develop properly.
Taxonomy provides the formal structure that connects morphological observations to species names and broader biological classifications. What many beginners don't initially appreciate is that taxonomy is not static — classifications are updated as new research emerges, meaning that a reliable, current reference source matters enormously. Working with a well-documented species as your first identification subject makes this process far more tractable. The first article linked below uses one such species as a practical case study, walking through exactly how morphological observation leads to confident identification.
→ Golden Teacher Spores: Identification Under the Microscope
How to Prepare a Microscope Slide With Spores
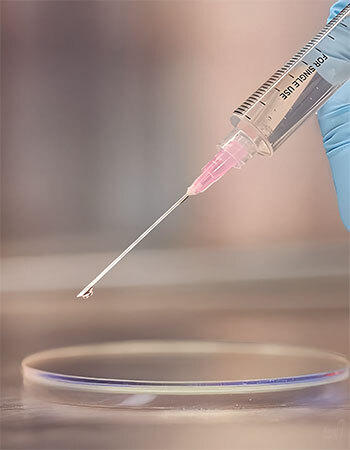
This is the step where good intentions meet fiddly reality. A pinch of spore print, a drop of water or Melzer's reagent, a coverslip lowered at an angle rather than dropped flat — get that wrong and you're staring at air bubbles instead of amyloid reactions. Nobody nails this on the first try, and that's fine. It's a hands skill, not a knowledge one, and it only comes with repetition.
None of this is complicated once you've done it a handful of times — it just feels that way the first week, when everything's fiddly and nothing looks like the diagram. Stick with it. That's really the whole secret.
Photographing and Documenting Spore Samples
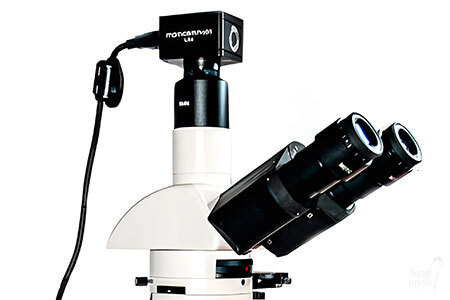
You'll swear you remember exactly what a spore looked like under the lens, then open a forum thread three weeks later and realise you've got nothing to compare it against. I've done this more times than I'd like to admit — brilliant slide, zero photo, completely wasted session.
A basic digital eyepiece camera solves most of it, though even a steady phone held to the lens works in a pinch. What matters more is consistency — same magnification noted, same lighting, same rough framing each time, so images are actually comparable later. Pair that with simple written notes (species, date, reagent used) and you've built something genuinely useful over time, not just a folder of pretty blobs.
Understanding Spore Taxonomy and Classification
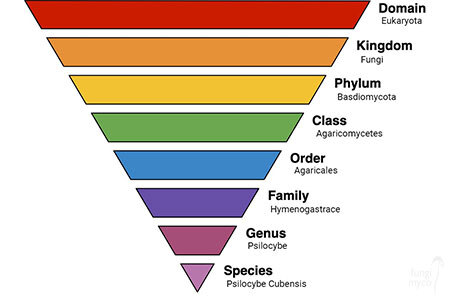
I didn't care about taxonomy for months. Honestly, I just wanted to see spores clearly and move on. Then one evening I noticed two "identical" samples reacting completely differently under Melzer's, and the whole thing suddenly mattered. Turns out that's fairly normal — the interest tends to arrive uninvited, usually once you've got enough slides behind you to notice the gaps in your own knowledge.
Taxonomy sounds academic, maybe even a bit dry. Really, though, it's just pattern recognition with better vocabulary attached. Spore shape, wall texture, colour reaction under reagent — all of it maps back to genus and species, but not in some rigid, checklist way. It's more intuitive than that once your eye adjusts. You're not memorising Latin names for the sake of it; you're learning to notice the small, specific differences that genuinely separate one group from another — a slightly ornamented wall here, an unusual spore shape there. None of this happens quickly, and trying to rush it tends to backfire. Better to let the pattern-spotting build naturally, slide by slide.
Building a Sustainable Research Practice Over Time
Spore microscopy is a practice, not a project. The distinction matters more than it might first appear. A single session under a microscope can be interesting. Dozens of sessions, carefully documented and built upon each other, become something genuinely valuable — a personal archive of observations, a sharpened eye, and a researcher who can draw meaningful conclusions rather than simply look at things.
Developing good habits early accelerates this progression enormously. Documentation is perhaps the most critical habit of all. Recording not just what you see but the conditions under which you saw it — magnification level, preparation method, sample age, lighting — gives every observation context. Without that context, a notebook full of descriptions is difficult to interpret retrospectively.
Equipment maintenance is equally important and often overlooked by beginners in the UK and beyond. A microscope with smudged optics or an improperly calibrated stage introduces variables that erode the reliability of your observations without you necessarily realising it. Returning to earlier cluster articles with the benefit of accumulated experience is one of the most productive things a developing researcher can do. Details that seemed minor at the start often prove significant later. The full collection of articles across this pillar supports that kind of iterative, deepening engagement.
FAQs
Spore microscopy is the study of fungal spores under magnification to examine their structure and aid identification. Researchers use it to distinguish species, document morphology, and build scientific understanding of fungi. Our cluster articles explore the full process from start to finish.
At a basic level, you need a microscope and a prepared spore sample in a suitable format. The format you choose — such as a syringe, swab, or print — depends on your goals. Our guides walk you through each option so you can make an informed decision.
Starting with a well-documented species makes the learning process much easier. Some species have highly distinctive spore characteristics that are easier to recognise and verify. Our articles on spore selection and species identification point you toward practical starting points.
Spore morphology refers to the physical characteristics of a spore — its shape, size, colour, and surface texture. These features differ between species and serve as reliable identification markers. Learning to observe and record them accurately is a core skill in mycological microscopy research.
Each format captures and stores spores differently, making them suited to different research applications. Syringes suspend spores in solution, swabs collect surface samples, and prints preserve spore deposits on paper. The right choice depends on your microscopy method and storage needs.
- UK Government — Misuse of Drugs Act 1971. Available at: https://www.legislation.gov.uk/ukpga/1971/38/contents (Accessed 11 April 2026).
- Fungal Morphology, Science Direct — Fungal Morphology. Available at: https://www.sciencedirect.com/topics/agricultural-and-biological-sciences/fungal-morphology (Accessed 12 June 2025).