")
Making your first Still Air Box (SAB)
How to Make a Still Air Box for Growing Mushrooms: Quick Answer
A Still Air Box (SAB) is a sealed plastic tote with two arm holes cut into one side. To build one: choose a clear 60–90 litre storage tote, mark two 60–70mm holes at arm height, cut them carefully with a hole saw or a heated craft knife, sand the edges smooth, and sanitise the interior with 70% isopropyl alcohol before every use. Leave it 5–10 minutes for the air to settle before you start work. A typical build costs £20–£30. See more on setting up your first grow space at home to ensure that you have what you need to get started.
What Is a Still Air Box, and Why Do Home Growers Use One?
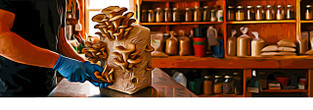
Lose a jar of grain to green mould and you understand exactly the problem a Still Air Box solves. It is one of the most practical things a beginner can build, and it costs very little next to the alternatives [1].
The principle is simple. Left sealed and undisturbed, airborne particles — dust, mould spores, bacteria — slowly settle to the bottom of a box, so the air near the top becomes noticeably cleaner than the surrounding room air [2]. Move your arms in slowly and you add a second effect, sometimes called the piston effect: the gentle downward displacement pushes any disturbed particles away from your open vessels.
This matters more than many growers realise. Homes here are often draughty and rarely have a dedicated cultivation space. Average indoor temperatures of 14–21°C actually sit well within the range gourmet species such as oyster, shiitake and lion's mane prefer — all entirely legal to cultivate. Temperature is rarely the problem. Airborne contamination reaching your jars before the mycelium can establish is.
Contamination is one of the main barriers to successful cultivation at any scale. For anyone working in a kitchen or a spare bedroom, a SAB is not a luxury — it is the first tool to have in place before you consider anything else.
Materials, Tools, and Building Your Still Air Box
You do not need a workshop or specialist equipment. Most of what you need is a high-street shop, or a next-day delivery, away.
The tote. Go for a clear plastic storage box between 60 and 90 litres. Clarity matters — you need to see what you are doing without removing the lid. The Really Useful Box range, Wham boxes (B&M and The Range), and Stewart storage totes all work well. Avoid coloured or opaque plastic.
Cutting tools. A 60–70mm hole saw on a cordless drill gives the cleanest result. No drill? A sharp craft knife will do. You will also want a marker pen and masking tape.
Finishing materials. Medium-grit sandpaper (80–120 grit), or a small file, to smooth the cut edges. This protects your arms and prevents micro-cracks that can trap contaminants.
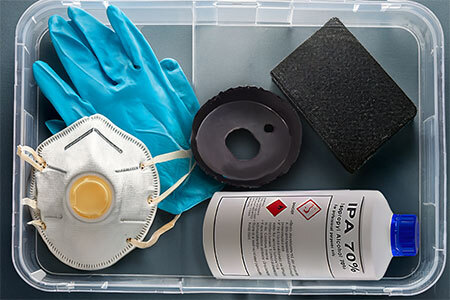
Consumables for every session. 70% isopropyl alcohol (IPA) spray, from mycology suppliers or general retailers. Nitrile gloves and a basic face mask are essential, not optional extras.
A typical build comes in between £20 and £30 — a small outlay for a meaningful drop in contamination risk across every session.
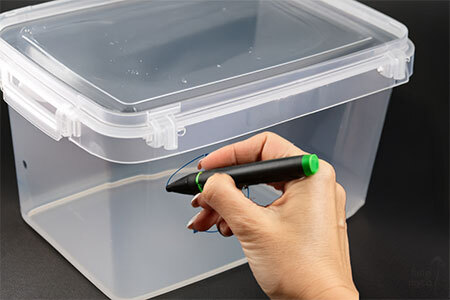
Step 1: Mark your hole positions
Turn the tote on its side. Position the holes roughly one-third up from the base, 20–25cm apart and centred on the width of the box. Mark a 60–70mm circle at each point.
Step 2: Cut the holes
Apply masking tape around each marked circle first. Use a hole saw on a slow drill speed, or warm the tip of a craft knife and cut in slow, deliberate arcs to avoid cracking the plastic.
Step 3: Sand and smooth every edge
Run 80–120 grit sandpaper around both holes until no sharp burrs remain.
Sanitising, Setup, and Sterile Technique Inside the Box
The build is only the start. More contamination happens from poor preparation than from poor construction — and this is where a lot of grows quietly go wrong.
Start by positioning the box well. Keep it away from windows, air vents, doorways, and any fan or heating source. A still corner of a room with the door closed is your best option.
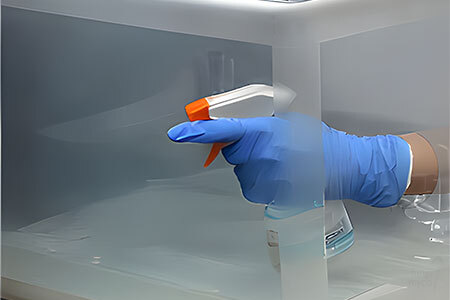
Wipe the entire interior — base, walls and the underside of the lid — with a cloth dampened with 70% IPA. Give the interior a light spray, replace the lid, and wait a minimum of 5–10 minutes before inserting your arms. The IPA needs time to evaporate and the air inside needs to settle again.
One correction to a widespread myth: IPA spray does not sterilise the air inside your SAB. It reduces surface contaminants on the walls and base. The clean air comes from stillness and particle settling — not from alcohol vapour.
Before inserting your arms, put your gloves on, spray them with IPA, and let them dry for 30 seconds. Enter the box slowly — no sudden movements, and no talking toward open vessels.
Suitable tasks include: agar pours, agar plate-to-plate transfers, grain-to-grain transfers, spore syringe inoculation, liquid culture inoculation, and tissue cloning from fresh fruiting bodies.
Never talk, cough, or breathe toward open vessels. If you are using a spirit lamp for flame sterilisation, never flame inside the box within 60 seconds of spraying IPA — alcohol vapour is flammable. Trichoderma, the green mould, is the contaminant that ends most grows, and it spreads almost entirely through airborne spores, which is exactly the risk correct SAB technique guards against. If you are working through our beginner-to-advanced gourmet growing guide, the SAB is the tool that opens up the intermediate stages with confidence.
Still Air Box vs. Laminar Flow Hood: When Should You Upgrade?
Most hobby growers never need to upgrade. That is worth saying plainly before anything else.
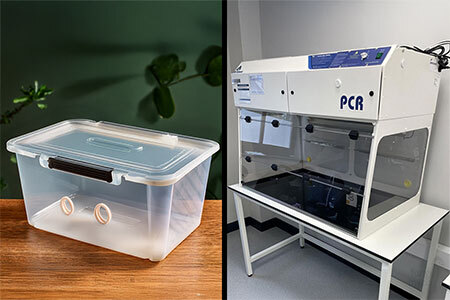
The fundamental difference is this. A SAB relies on particle settling in undisturbed air — a passive, physics-based process. A laminar flow hood uses a HEPA filter and fan to create a continuous stream of filtered, positively pressurised air across your workspace, actively pushing contaminants away. The flow hood offers superior protection. It also costs between £300 and £800, needs a dedicated space, and produces a constant ambient noise that makes it a poor fit for a spare bedroom.
It helps to think of the progression in three stages. The SAB is stage one — beginner, budget-conscious, and genuinely practical for occasional grows and for learning sterile technique. Stage two is a filter flow unit (FFU), a quieter, more compact option in the £150–£300 range that suits intermediate growers doing regular agar work. Stage three is a full laminar flow hood, relevant only when you are running high volumes of cultures, cloning regularly, or moving toward a semi-commercial operation.
The signals worth watching for: you are following correct SAB technique consistently and still seeing contamination rates above 20–30% on clean grain transfers; you are doing more than three or four agar sessions a week; or you have scaled to the point where lost jars are a real financial loss rather than a learning experience.
At FungiMyco we have helped plenty of home growers through exactly this progression, and the honest truth is that excellent results are achievable at every stage when technique is sound. A £25 SAB, built and used well, will outperform a poorly used flow hood every time.
Frequently Asked Questions
A Still Air Box creates a low-contamination workspace for handling mushroom cultures. When sealed and undisturbed, airborne particles settle to the bottom, giving you a cleaner environment to inoculate jars, pour agar plates, or perform grain-to-grain transfers without needing an expensive laminar flow hood.
Apply masking tape around the marked circle before cutting to reduce stress fractures. Use a hole saw on a low drill speed, or heat a craft knife to slice rather than force through the plastic. Sand the edges smooth once cut. Avoid pressing hard or rushing, as cold or brittle plastic cracks easily.
A Still Air Box works by letting airborne particles settle naturally when the air is undisturbed. A laminar flow hood uses a HEPA filter and fan to push a continuous stream of clean, filtered air across your workspace. Flow hoods offer superior protection but cost £300 or more, which makes the SAB ideal for beginners.
Most growers build a functional Still Air Box for between £20 and £30. The main cost is a clear plastic storage tote from somewhere like Argos, B&M, or The Range. Isopropyl alcohol, sandpaper, and a hole saw add little, especially if you already own basic tools.
- Quora — How to Grow Mushrooms at Home. Available at: https://www.quora.com/What-is-the-cheapest-laminar-flow-set-up-for-growing-mushrooms-Is-there-any-other-way-to-inoculate-bags-without-the-worry-of-contamination (Accessed 2 April 2026).
- WikiPedia — Air-Free Technique. Available at: https://en.wikipedia.org/wiki/Air-free_technique (Accessed 6 april 2026).